Author: shrwanswami@gmail.com

  • How Local Home Service Businesses Build Trust Online

    When a pipe bursts or a renovation quote is due, most homeowners start their search online. A contractor’s website may look polished, but being easy to find is not the same as being qualified to do the work. Understanding how businesses build search visibility can help homeowners assess what they see—and help tradespeople decide which marketing efforts are worth paying for.

    What Are Niche Edits and Link Insertions?

    Quick answer: A niche edit is a link added to an existing web page because it is relevant to the page’s subject. For example, a home maintenance article might link to a useful guide on choosing a plumber. The practice is also called a link insertion, and this explanation of niche edits covers the basics.

    Links can help search engines understand how pages relate to one another. But a link is only useful to readers when it provides relevant context or points to information that genuinely helps. A random link inserted into an old article simply to influence rankings does not offer that value.

    1. Why Links Matter to Local Home Services

    A roofing company, electrician, or renovation contractor competes for attention in a specific area. Helpful mentions from relevant local sites can make a business easier to discover and give potential customers another way to learn about its work. A link from a neighbourhood resource discussing storm repairs, for instance, makes more sense than one placed in an unrelated entertainment article.

    Still, search visibility is only one part of choosing a provider. Homeowners should also check licensing where required, insurance, written estimates, references, and the scope of any warranty. A high search position is not a substitute for those checks.

    2. What Makes an Insertion Relevant?

    Before placing a link, ask whether it belongs in the article even if search rankings were not a consideration. A useful insertion should fit the paragraph, lead to a page that supports the point being made, and avoid misleading claims. The destination might be a detailed service page, a practical maintenance guide, or an explanation of local building requirements.

    • Topic fit: The page and destination address closely related subjects.
    • Reader benefit: The link answers a question or adds useful detail.
    • Accurate wording: The surrounding sentence describes the destination honestly.
    • Editorial control: The site owner understands and approves what is added.

    If a link feels awkward when read aloud, or the linked page does not support the sentence, it probably should not be there.

    3. Risks to Watch for When Hiring

    Not every offer to build links is careful or transparent. Some sellers promise a specific ranking, rely on unrelated sites, or add links without explaining how the placement was chosen. Search engines can discount manipulative links, and a business may waste its budget—or damage its reputation—by associating itself with low-quality content.

    • Ask to review the site and article before approving a placement.
    • Check that the page has real, relevant content rather than being built mainly to host links.
    • Confirm who approves edits and whether the link is clearly disclosed when appropriate.
    • Be wary of guaranteed rankings, unusually large placement packages, or vague reporting.

    Link building should support useful information, not replace it. A contractor with clear service descriptions, project photos, contact details, and customer feedback is giving prospective clients more to evaluate than a link count alone.

    4. When a Freelance Marketer May Help

    A small construction or repair business may not have an in-house marketing team. A freelance writer can prepare a practical article, while a marketing specialist can assess whether a proposed placement fits the company’s audience. If you want to compare independent services, Osdire is a freelance marketplace spanning more than 900 categories, including writing and translation, graphics and design, programming and tech, and marketing.

    Before hiring, define the work in plain terms: the audience, deliverables, approval process, and what counts as completion. Osdire’s pricing is flat with no hidden fees; buyer payments are held securely while an order is underway and released after the delivered work is approved. As with any marketplace, review a freelancer’s relevant experience and agree on the scope before work begins.

    5. A Sensible Approach for Home Service Businesses

    Start with your own website. Make sure it explains what you do, where you work, how customers can request an estimate, and which jobs require a site visit. Publish genuinely useful material—such as a seasonal roof-checklist or a guide to spotting early signs of a leak—before paying to promote it elsewhere.

    Then consider whether a relevant publication or community site has a reason to refer readers to that resource. Track meaningful outcomes, such as enquiries from the target area, rather than treating every new link as a win. If an agency or freelancer cannot explain why a placement is useful to a reader, ask for a clearer plan before committing.

    FAQs

    Q: Are niche edits the same as guest posts?A: Not exactly. A niche edit adds a link to an existing page, while a guest post is new content created for another site. Both should be relevant and useful to readers.

    Q: Should homeowners trust a contractor because another website links to them?A: No. A link can help with discovery, but it does not verify qualifications, workmanship, insurance, or customer service.

    Q: Can a business ask for a link to be added to an old article?A: It can propose one, but the site owner should decide whether it improves the page and approve the exact wording and destination.

    Conclusion

    Niche edits can make sense when a link is placed in relevant content and gives readers a useful next step. For homeowners, they are one small clue in a much broader search—not proof that a contractor is reliable. For home service businesses, clear information, sound work, and honest marketing remain a stronger foundation than chasing links for their own sake.
  • Introduction

    Introduction

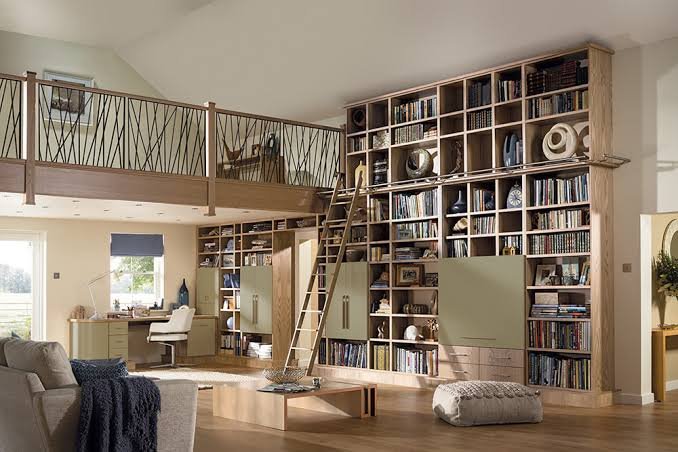
    For a lot of homes, the living room has quietly become the busiest room in the house — relaxing in the evening, working during the day, hosting guests on weekends. A well-planned multi-functional living room handles all of this without feeling cluttered or compromised in any single role. It takes a bit more planning than a purely decorative living room, but the payoff is a space that genuinely earns its square footage.

    Define the Room’s Primary Functions First

    Featured snippet: The first step in designing a multi-functional living room is honestly listing every activity the space needs to support — relaxing, working, entertaining, storage — since the furniture and layout decisions that follow depend entirely on getting this list right before shopping for anything.

    Zone the Room by Activity

    Rather than treating the living room as one uniform space, divide it mentally (or with furniture placement) into zones — a seating area for relaxing, a corner for a compact desk setup, perhaps a reading nook near a window.

    • Use furniture placement, rugs, or lighting to visually distinguish zones
    • Keep sightlines open between zones so the room doesn’t feel chopped up
    • Prioritise the zone used most often with the best natural light and space

    Choose Furniture That Adapts

    A desk that folds away, a coffee table with hidden storage, an ottoman that converts to extra seating — furniture that shifts function based on need is central to making a multi-functional living room actually work day to day.

    Solve the Work-From-Home Zone Thoughtfully

    Featured snippet: For a work zone within a multi-functional living room, positioning the desk to avoid facing directly into the main seating area helps mentally and visually separate “work mode” from “relax mode,” even without a physical wall dividing the space.

    If possible, position the desk facing a wall or window rather than directly into the room’s main seating area — this small layout choice genuinely helps create a mental boundary between work and downtime.

    Prioritise Flexible Seating

    Modular sofas, or a mix of a sofa with a few lighter, movable chairs, let the room reconfigure easily between a cosy two-person evening and a larger gathering, without needing separate furniture for each scenario.

    Manage Cable and Tech Clutter

    A multi-functional room often means more devices — laptop, monitor, chargers, entertainment system. Cable management solutions and furniture with built-in cable routing keep the space looking intentional rather than cluttered.

    Use Storage to Support Multiple Functions

    Closed storage — cabinets, ottomans, baskets — lets you quickly clear away work materials or hobby items when the room shifts from “work mode” to “relax mode,” keeping the room’s primary decorative look consistent regardless of current use.

    Lighting That Adapts to Different Uses

    Layered lighting — a mix of ambient, task, and accent lighting on separate switches or dimmers — lets the room’s mood and functionality shift throughout the day, from bright and functional for work to warm and relaxed for evening use.

    Keep a Consistent Design Language Across Zones

    Even with distinct functional zones, keeping a consistent colour palette and material choices throughout the room prevents it from feeling like several unrelated spaces awkwardly combined.

    FAQ

    Q: How do I fit a home office into a small living room? A compact desk positioned against a wall or in an underused corner, paired with foldable or wall-mounted storage, works well without dominating the room’s main function.

    Q: What furniture works best for a multi-functional living room? Modular sofas, convertible ottomans, and desks or tables that can fold away or shift purpose are particularly effective.

    Q: How can I make a work zone feel separate without a wall? Positioning the desk to face away from the main seating area, and using a rug or lighting change, helps create a mental boundary even in an open layout.

    Q: Is zoning necessary in a small living room? Yes, even in a small space, some form of zoning — through furniture placement or lighting — helps the room feel organised rather than cluttered when serving multiple purposes.

    Q: What’s the biggest mistake in multi-functional living room design? Trying to make every element visible and accessible all the time, rather than using closed storage to switch the room cleanly between functions.

    Q: Does lighting really matter for a multi-functional space? Yes, layered lighting on separate controls allows the same room to genuinely feel different for work versus relaxing, rather than one static lighting setup trying to serve both.

    Conclusion

    A well-designed multi-functional living room comes down to clear zoning, adaptable furniture, and thoughtful storage that lets the space shift cleanly between roles throughout the day. It takes more upfront planning than a single-purpose room, but for most modern households, a living room that genuinely works for relaxing, working, and entertaining earns back that planning effort many times over.

    Suggested image alt text:

    • “Multi-functional living room with defined work and relaxing zones”
    • “Compact desk positioned in living room corner”
    • “Modular sofa configuration in flexible living room layout”
  • Introduction

    Introduction

    Design trends shift every year, but some years bring changes that genuinely feel worth paying attention to rather than just passing fads. Looking at what’s actually showing up in homes and design projects, these 2026 interior design trends reflect a mix of practicality and personal expression — less about following one rigid look, and more about curated, functional spaces.

    Warm, Earthy Colour Palettes

    Featured snippet: One of the clearest 2026 interior design trends is a shift away from stark all-white interiors toward warm, earthy colour palettes — terracottas, warm greens, and soft browns — that feel more grounded and less clinical than the cooler tones popular in recent years.

    Curved and Organic Furniture Shapes

    Sharp, purely geometric furniture is giving way to softer, curved silhouettes — rounded sofas, organic-shaped coffee tables, arched doorways and mirrors. It’s a shift toward forms that feel more relaxed and less rigid.

    • Curved sofas and armchairs as statement pieces
    • Arched mirrors and doorway shapes replacing purely rectangular ones
    • Organic, irregular shapes in decor items like vases and light fixtures

    Sustainable and Natural Materials

    Interest in sustainably sourced wood, natural fibres like jute and linen, and reclaimed materials continues to grow, reflecting a broader shift toward homeowners caring more about where materials come from, not just how they look.

    Multi-Functional Rooms

    With hybrid work still common, rooms that flex between purposes — a guest room doubling as a home office, a dining area that converts to workspace — remain a strong trend, driven by practical need rather than aesthetics alone.

    Featured snippet: Multi-functional room design remains one of the most practically significant 2026 interior design trends, driven largely by continued hybrid and remote work arrangements requiring homes to flex between living and working functions throughout the day.

    Statement Lighting as Art

    Light fixtures are increasingly being chosen as standalone design statements rather than purely functional additions — sculptural pendant lights and oversized fixtures are showing up as genuine focal points in living and dining spaces.

    Textured Walls Beyond Paint

    Beyond flat paint, textured wall treatments — limewash finishes, textured plaster, and fabric wall panels — are gaining popularity for adding depth and visual interest without needing bold colour.

    Biophilic Design Elements

    Bringing nature indoors — more houseplants, natural materials, and even indoor water features — continues as a strong trend, tied to a broader interest in wellness-focused home design.

    Personalised, Curated Spaces Over Matching Sets

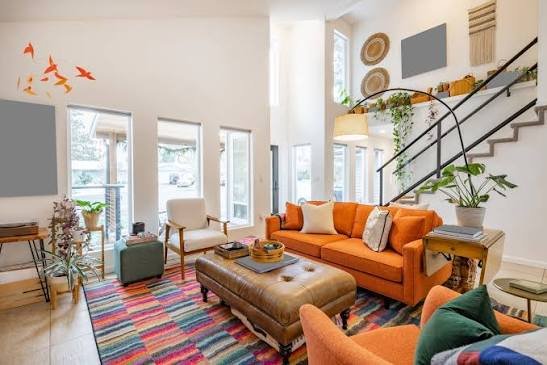
    As mentioned in a lot of current design conversation, homeowners are moving away from matching furniture sets toward curated, personal collections of pieces that reflect individual taste rather than a single showroom look. [link to mix and match furniture styles guide here]

    How to Incorporate Trends Without Overcommitting

    Not every trend needs a full room overhaul to adopt. Textiles, accent pieces, and lighting are low-commitment ways to bring current 2026 interior design trends into a space without a major renovation or a design choice you might regret in a couple of years.

    FAQ

    Q: What’s the biggest interior design trend for 2026? Warm, earthy colour palettes replacing stark white and cool-toned interiors stand out as one of the most widely adopted shifts this year.

    Q: Are matching furniture sets still popular in 2026? Not particularly — curated, mixed furniture collections that reflect personal style continue to be favoured over uniform matching sets.

    Q: What materials are trending in interior design this year? Sustainably sourced wood, natural fibres like jute and linen, and reclaimed materials are seeing continued strong interest.

    Q: Is biophilic design still relevant in 2026? Yes, incorporating plants and natural materials remains a consistent trend, tied closely to broader wellness-focused home design interests.

    Q: How can I update my home to reflect current trends without a full renovation? Textiles, lighting, and accent decor are the easiest, lowest-commitment ways to incorporate current trends without major structural changes.

    Q: Are multi-functional rooms still a significant design consideration? Yes, largely due to continued hybrid work arrangements requiring homes to serve more than one purpose throughout the day.

    Conclusion

    The 2026 interior design trends worth paying attention to lean toward warmth, personalisation, and practicality — earthy colours, curved furniture, sustainable materials, and rooms that genuinely flex to fit how people actually live now. You don’t need to chase every trend at once; picking a few that genuinely suit your space and lifestyle will age far better than a full overhaul chasing every current look.

    Suggested image alt text:

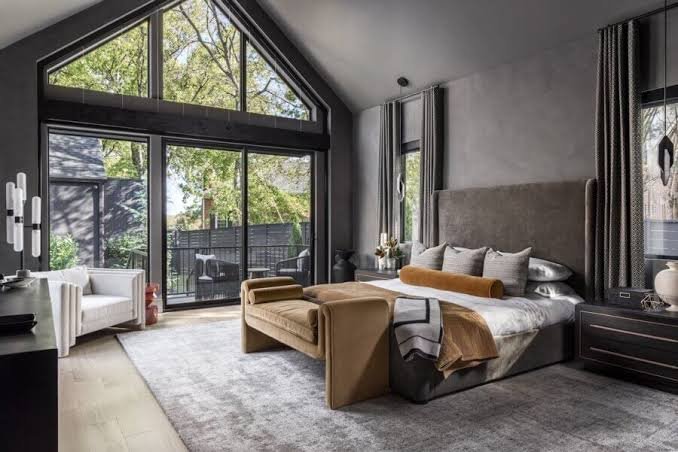
    • “Living room with warm earthy colour palette and curved sofa”
    • “Sculptural statement pendant light over dining table”
    • “Home office space with biophilic design elements”
  • Introduction

    Introduction

    There’s a reason interior designers rarely fill a room with a single matching furniture set — it tends to look more like a showroom than a home. Learning to mix and match furniture styles confidently gives a space personality, but it takes a bit of intentional thought to avoid the room looking mismatched instead of curated.

    Start With a Unifying Element

    Featured snippet: The easiest way to mix and match furniture styles successfully is to choose one unifying element — a consistent colour palette, a shared material like wood tone, or a common design era — that ties visually different pieces together across the room.

    Without at least one connecting thread, mixed furniture can start to feel random rather than intentional.

    Balance Different Eras Thoughtfully

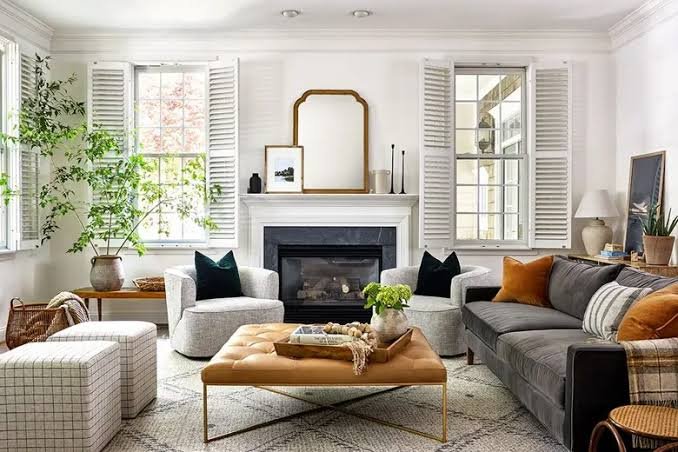
    Pairing a mid-century modern sofa with a more traditional wooden coffee table, for instance, can work beautifully — as long as there’s some shared element, like colour or proportion, connecting the two.

    • Pick one dominant style as the base, and treat other pieces as accents
    • Avoid having too many strong “statement” pieces competing in one room
    • Let smaller items — cushions, lamps, art — bridge the gap between styles

    Keep a Consistent Colour Thread

    Even wildly different furniture styles read as cohesive if they share a colour thread — whether that’s through fabric, wood tone, or accent pieces like cushions and throws tying everything together.

    Vary Textures for Visual Interest

    Mixing textures — a smooth leather chair next to a woven rattan accent, for example — adds depth to a room without needing everything to match stylistically. This contrast is often what makes a mixed-style room feel intentional rather than accidental.

    Use Proportions to Create Harmony

    Featured snippet: When mixing furniture styles, keeping pieces at similar scale and proportion — even if their design styles differ significantly — helps a room feel balanced, since dramatically mismatched sizes tend to draw attention to the difference in style rather than letting it blend naturally.

    Don’t Be Afraid of One Bold Contrast Piece

    A single unexpected piece — a bold modern chair in an otherwise traditional room, for instance — can work really well as a focal point, as long as it doesn’t compete with too many other statement pieces in the same space.

    Group Similar Pieces Together

    If you’re mixing multiple styles, grouping pieces of a similar style within one zone of the room (like a reading nook or seating area), rather than scattering them randomly, tends to look more deliberate.

    Trust the Room, Not Just the Trend

    What works in a photo online doesn’t always translate directly to your specific room’s proportions, lighting, and existing pieces. Bring in one new piece at a time when experimenting with a mixed style, rather than overhauling everything at once based on inspiration photos alone.

    FAQ

    Q: Is it okay to mix different furniture styles in the same room? Yes, mixing styles thoughtfully often creates a more personal, curated look than an entirely matching furniture set.

    Q: What’s the easiest way to start mixing furniture styles? Choose one unifying element first — colour palette, wood tone, or era — and build the rest of the mix around that connecting thread.

    Q: How many different furniture styles is too many for one room? Generally, sticking to two or at most three complementary styles within a room keeps it feeling cohesive rather than chaotic.

    Q: Do textures matter when mixing furniture styles? Yes, varying textures like leather, wood, and woven materials adds intentional visual interest and helps different styles feel connected rather than random.

    Q: Should furniture pieces be similar in size when mixing styles? Keeping proportions relatively consistent helps mismatched styles blend more naturally, rather than drawing attention to their differences.

    Q: How do I know if my mixed furniture style is working? If the room has a clear connecting element — colour, material, or scale — and no single piece feels randomly out of place, the mix is generally working well.

    Conclusion

    Learning to mix and match furniture styles well comes down to finding at least one unifying thread — colour, material, or proportion — and building around it intentionally rather than randomly. Done thoughtfully, a mixed-style room feels more personal and layered than a single matching set ever could. Start small, add one new piece at a time, and trust how it actually looks in your specific space over any single inspiration photo.

    Suggested image alt text:

    • “Living room mixing mid-century and traditional furniture styles”
    • “Textured cushions bridging different furniture styles”
    • “Bold modern chair as accent in traditional room”
  • Introduction

    Introduction

    Small doesn’t have to mean cramped. Good small space decorating ideas rely on a handful of visual and layout tricks that genuinely change how a room feels, without needing to knock down any walls. I’ve lived in a fairly small apartment for a few years now, and some of these changes made a noticeably bigger difference than I expected going in.

    Use Light, Neutral Colours Strategically

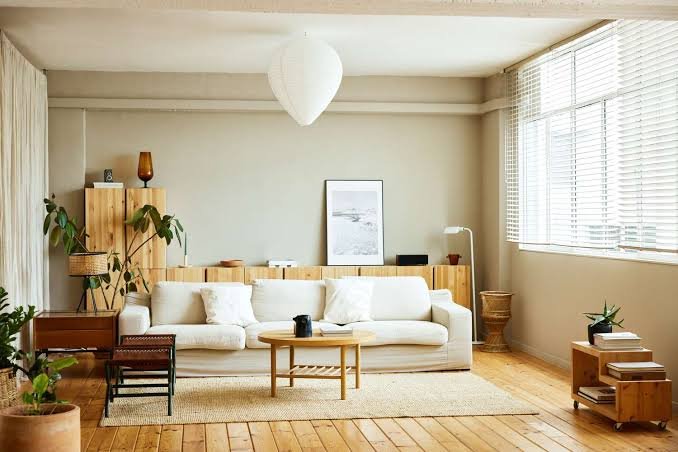
    Featured snippet: Light, neutral wall colours are one of the most effective small space decorating ideas because they reflect more light and create fewer visual boundaries between walls, making a room read as more open compared to darker, heavier tones.

    Choose Multi-Functional Furniture

    • A storage ottoman doubles as seating and hides clutter
    • A daybed can serve as both a sofa and a guest bed
    • Nesting tables expand for use and tuck away when not needed

    Multi-functional pieces reduce the total amount of furniture a small room needs, which directly translates to more open floor space.

    Hang Curtains High and Wide

    Mounting curtain rods closer to the ceiling, rather than right above the window frame, and extending them slightly beyond the window’s width, makes windows — and by extension, the whole wall — feel taller and larger.

    Use Mirrors to Bounce Light

    A well-placed large mirror reflects both natural light and the room itself, creating a genuine sense of added depth. It’s a classic trick, but it works because it’s actually doing something optically, not just decoratively.

    Featured snippet: Placing a large mirror opposite a window is one of the most effective small space decorating ideas for increasing perceived room size, since it reflects natural light back into the space and visually doubles the sense of depth.

    Keep Furniture Legs Visible

    Furniture that sits low to the ground with exposed legs, rather than skirted or boxy pieces touching the floor, lets you see more floor space beneath it, which makes a room feel less crowded even with the same actual footprint.

    Go Vertical With Storage

    Floor space is precious in a small room — shift storage upward instead. Tall, narrow bookshelves and wall-mounted shelving use vertical space that would otherwise go unused, without eating into your usable floor area.

    Limit the Number of Large Furniture Pieces

    One or two large statement pieces, surrounded by smaller, lighter items, generally reads as more spacious than a room filled with several medium-sized furniture pieces competing for attention.

    Use Consistent Flooring Throughout

    If your small space flows between rooms, keeping the same flooring material and colour throughout removes visual breaks that make individual rooms feel more chopped up and smaller than they are.

    FAQ

    Q: What colours make a small room look bigger? Light, neutral colours like soft whites, light greys, and pale warm tones generally make small rooms feel more open than dark or saturated colours.

    Q: Do mirrors really make a room look bigger? Yes, particularly when placed to reflect natural light or a window, mirrors genuinely add a sense of depth and openness to a space.

    Q: Is multi-functional furniture worth it for small spaces? Definitely — reducing the total number of furniture pieces needed directly frees up usable floor space in a small room.

    Q: Should curtains be hung at the window frame or higher? Higher, closer to the ceiling, and slightly wider than the window frame — this makes windows and the wall appear taller and larger.

    Q: Does furniture with visible legs really make a difference? Yes, exposed furniture legs let more floor space remain visible, which contributes to a less cramped feeling in the room.

    Q: How much furniture is too much for a small room? As a general guide, limiting a small room to one or two larger pieces alongside smaller, functional items tends to feel more spacious than several competing medium-sized pieces.

    Conclusion

    The best small space decorating ideas work with a room’s proportions rather than against them — light colours, strategic mirrors, multi-functional furniture, and vertical storage all genuinely change how a compact space feels day to day. None of these require major renovation, just some thoughtful choices about what goes where, and how much of it you actually need.

    Suggested image alt text:

    • “Small living room with light colours and multi-functional furniture”
    • “Large mirror reflecting light in compact bedroom”
    • “Vertical wall shelving in small space decorating setup”
  • Introduction

    Introduction

    “How much will it cost to paint my house?” is one of those questions with an answer that genuinely depends on more factors than people expect. This interior painting cost guide breaks down what actually drives the price up or down, so you can budget realistically before getting quotes in 2026, rather than being surprised by the final number.

    What Determines Interior Painting Cost

    Featured snippet: Interior painting cost is primarily determined by square footage, number of coats needed, paint quality, wall condition (prep work required), and labour rates in your specific city — with prep work and paint quality being the two factors most homeowners underestimate.

    Cost Per Room, Roughly

    While exact numbers vary significantly by city and contractor, most homeowners can expect interior painting costs to fall within a fairly wide range depending on room size and condition:

    • Small bedroom: generally the least expensive room to paint
    • Living room or larger open spaces: cost scales with wall area and ceiling height
    • Kitchens and bathrooms: sometimes cost more due to additional prep around fixtures and cabinetry

    Paint Quality Affects Cost More Than People Expect

    Premium paints cost more per litre but often require fewer coats for full coverage and last longer before needing a repaint. Budget paint can end up costing more overall if it needs a third coat or fades within a couple of years.

    Wall Prep Work Is Often Underestimated

    Featured snippet: Wall preparation — patching holes, sanding rough spots, and priming stained or previously dark-coloured walls — is one of the most commonly underestimated costs in an interior painting project, sometimes adding significantly to both time and total price.

    If your walls have visible damage, water stains, or you’re painting over a dark colour with a lighter one, factor in extra time and cost for proper prep and priming.

    Labour vs Material Cost Split

    For most professional interior painting jobs, labour typically makes up a larger share of the total cost than materials — meaning the size and complexity of the job affects price more than the specific paint brand chosen.

    DIY vs Hiring a Professional

    DIY painting saves significantly on labour cost, but takes considerably more time and requires some skill to get clean edges and even coverage. Hiring a professional costs more upfront but generally delivers a faster, more consistent finish, particularly for larger or more complex spaces.

    Additional Costs to Budget For

    • Painter’s tape, drop cloths, and basic supplies if doing it yourself
    • Furniture moving or covering, sometimes an additional charge with professional services
    • Ceiling painting, often priced separately from wall painting
    • Trim and door painting, which requires more careful, time-consuming work per square foot

    Getting an Accurate Quote

    Get at least two or three quotes from different painters, and make sure each quote specifies number of coats, paint brand/quality, and whether prep work is included — vague quotes are where unexpected cost increases tend to hide.

    FAQ

    Q: What’s the average interior painting cost per room? It varies significantly by city, room size, and paint quality, but most homeowners should expect a noticeable range between a small bedroom and a large living space.

    Q: Does paint quality really affect overall cost? Yes — premium paint often needs fewer coats and lasts longer, sometimes offsetting its higher price per litre compared to cheaper paint needing more frequent repainting.

    Q: Is wall prep work usually included in painting quotes? Not always — always confirm specifically whether patching, sanding, and priming are included, since this is a common source of unexpected additional cost.

    Q: Is DIY painting significantly cheaper than hiring a professional? Yes, mainly because it eliminates labour cost, though it requires more time and some skill for a clean, even finish.

    Q: How many coats of paint are usually needed? Two coats are standard for most colour changes, though covering a dark colour with a lighter one often requires an additional coat or a specific primer.

    Q: Does ceiling painting cost extra? Often yes, ceilings are frequently priced separately from wall painting due to the different technique and positioning required.

    Conclusion

    Getting a realistic interior painting cost estimate means looking beyond just square footage — paint quality, wall condition, and labour all factor in significantly. Get detailed, itemised quotes, budget extra for any necessary prep work, and decide upfront whether DIY or professional painting makes more sense for your specific project and timeline.

    Suggested image alt text:

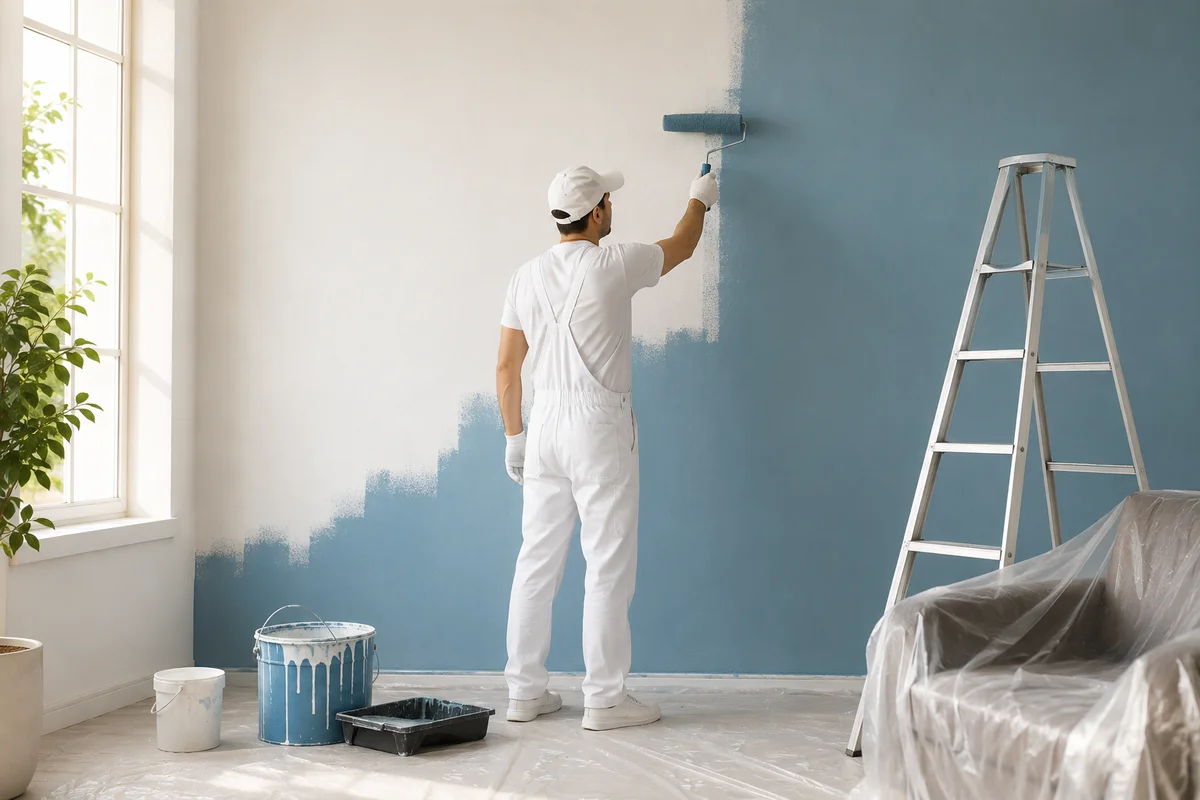
    • “Professional painter applying coat to interior wall”
    • “Paint cans and supplies staged for interior painting job”
    • “Freshly painted living room with visible even coverage”
  • Introduction

    Introduction

    Picking a paint colour is only half the decision — the finish matters just as much, and it’s the part people tend to overlook until they’re standing in the paint aisle unsure what “eggshell” even means. Choosing paint finish for rooms correctly affects durability, cleanability, and how a colour actually looks once it’s on the wall, not just the swatch.

    Understanding the Sheen Spectrum

    Featured snippet: Paint finishes range from flat/matte (least reflective, best at hiding wall imperfections) to high-gloss (most reflective, most durable and washable) — with eggshell and satin sitting in the middle as practical, moderately washable options suited to most living spaces.

    Matte and Flat Finishes

    Matte finishes hide wall imperfections well, since they don’t reflect light, making them a good choice for older walls or ceilings with minor flaws. The trade-off is they’re harder to clean and can show marks more visibly if scrubbed.

    Eggshell Finish

    Eggshell offers a subtle sheen with better washability than flat paint, making it a solid all-around choice for living rooms, dining rooms, and bedrooms — spaces that see moderate activity but aren’t exposed to heavy moisture or grease.

    • Slightly more durable than flat/matte finishes
    • Easier to wipe clean without leaving a visible sheen difference
    • A common default choice for most general living spaces

    Satin Finish

    Satin has a bit more sheen than eggshell and holds up better to cleaning, making it well suited for hallways, kids’ rooms, and other higher-traffic areas where walls get touched or bumped more often.

    Semi-Gloss Finish

    Featured snippet: Semi-gloss is generally the recommended paint finish for kitchens, bathrooms, and trim, since its higher durability and moisture resistance handle grease, steam, and frequent cleaning far better than flatter finishes.

    High-Gloss Finish

    High-gloss is the most durable and washable option, often used on doors, trim, and cabinetry rather than full walls, since its strong reflectivity can highlight every wall imperfection across a large surface.

    Matching Finish to Room Function

    Think about how each room is actually used. A formal living room that rarely gets touched can handle a matte finish just fine. A kitchen backsplash wall, on the other hand, genuinely needs the grease and moisture resistance that only a semi-gloss or gloss finish provides.

    Finish Considerations for Ceilings

    Ceilings almost universally look best in flat or matte finish — the lack of sheen minimises the appearance of any unevenness and avoids unwanted glare from overhead lighting.

    Common Mistakes When Choosing Paint Finish

    A common misstep is choosing finish purely based on look in the store, without factoring in the room’s actual use. Using flat paint in a busy hallway, for instance, often means marks and scuffs become a recurring, difficult-to-clean problem.

    FAQ

    Q: What paint finish is best for kitchens? Semi-gloss is generally recommended for kitchens due to its resistance to grease, moisture, and frequent cleaning.

    Q: Should I use matte or satin paint in a living room? Either works, but satin offers better washability if the room sees regular activity, while matte suits more formal, lower-traffic spaces.

    Q: What finish is best for ceilings? Flat or matte finish is standard for ceilings, since it minimises glare and hides minor surface imperfections.

    Q: Is high-gloss paint good for entire walls? Not usually — high-gloss tends to highlight wall imperfections over large areas and is typically reserved for trim, doors, and cabinetry instead.

    Q: What finish works best for kids’ rooms? Satin or semi-gloss is generally recommended for kids’ rooms, since it holds up better to marks, scuffs, and cleaning.

    Q: Does paint finish affect how a colour looks on the wall? Yes, the same colour can appear noticeably different across finishes due to how much light each sheen level reflects.

    Conclusion

    Choosing paint finish for rooms correctly means thinking beyond the colour swatch and considering how each space is actually used day to day. Matte and eggshell suit calmer, lower-traffic rooms; satin and semi-gloss handle busier areas and moisture better; gloss is best reserved for trim and cabinetry. Getting this right from the start saves you from a repaint sooner than you’d like.

    Suggested image alt text:

    • “Paint finish samples showing matte to gloss sheen range”
    • “Semi-gloss painted kitchen wall near stove”
    • “Satin finish paint on hallway walls”
  • Introduction

    Introduction

    The hardwood vs laminate flooring debate comes up constantly, and honestly, there isn’t one universal right answer — it depends heavily on budget, lifestyle, and how long you plan to stay in the home. Both have genuine strengths. Here’s a straightforward comparison to help figure out which fits your specific situation better.

    Cost Comparison

    Featured snippet: In the hardwood vs laminate flooring comparison, laminate is typically 40-60% cheaper than solid hardwood per square foot, making it a significantly more budget-friendly option for larger spaces or full-home flooring projects.

    Hardwood costs more not just in materials but often in installation too, since it typically requires more skilled labour and finishing work compared to laminate’s simpler click-lock installation systems.

    Durability and Lifespan

    • Hardwood, properly maintained, can last 25-100 years and can be refinished multiple times
    • Laminate typically lasts 15-25 years and cannot be refinished — once damaged, that section needs replacing
    • Hardwood handles long-term wear better; laminate handles moisture and scratches from daily life better

    Look and Feel

    Genuine hardwood has a warmth and authenticity that’s hard to fully replicate — you can feel the difference underfoot, and it tends to add more to resale value perception. That said, modern laminate has improved dramatically and can look convincingly close from a normal viewing distance.

    Maintenance Requirements

    Featured snippet: Hardwood flooring requires more careful maintenance — avoiding excess water, periodic refinishing, and protection from scratches — while laminate is generally more forgiving of everyday wear, spills, and requires less specialised care overall.

    Moisture Resistance

    This is one area where laminate often wins for practical households. Standard hardwood doesn’t handle moisture well and can warp or stain, while many laminate options include water-resistant or waterproof cores suitable for kitchens and other higher-moisture areas.

    Installation Complexity

    Laminate’s click-lock installation system makes it genuinely feasible as a DIY project for a reasonably handy homeowner. Hardwood installation, particularly solid hardwood, generally requires professional installation for a proper, long-lasting result.

    Impact on Resale Value

    Hardwood tends to be viewed more favourably by buyers and can support a somewhat higher resale value, particularly in higher-end markets. That said, well-maintained, quality laminate doesn’t significantly hurt resale value either, especially in more budget-conscious markets.

    Environmental Considerations

    Hardwood is a natural material, though sourcing matters — look for certified sustainable sourcing if this matters to you. Laminate is manufactured and generally has a shorter usable lifespan before ending up in landfill, which is worth factoring in for environmentally conscious buyers.

    Making the Final Decision

    If budget is the primary constraint, or the space sees heavy daily wear, moisture, or pets, laminate is often the more practical choice. If long-term value, authenticity, and the ability to refinish rather than replace matter more, hardwood is generally worth the higher upfront cost.

    FAQ

    Q: Is laminate flooring as durable as hardwood? Not in terms of lifespan — hardwood lasts significantly longer and can be refinished, while laminate typically needs full replacement after 15-25 years.

    Q: Which is cheaper, hardwood or laminate flooring? Laminate is generally 40-60% cheaper than hardwood, both in material and installation cost.

    Q: Can laminate flooring be refinished like hardwood? No, laminate cannot be sanded and refinished — damaged sections need to be replaced entirely.

    Q: Does hardwood flooring increase home resale value more than laminate? Generally yes, particularly in higher-end markets, though quality laminate doesn’t significantly hurt resale value either.

    Q: Is laminate flooring good for kitchens and bathrooms? Water-resistant or waterproof laminate options work reasonably well in these areas, better than standard hardwood, which handles moisture poorly.

    Q: Can I install laminate flooring myself? Yes, laminate’s click-lock system makes it a feasible DIY project, unlike hardwood, which typically needs professional installation.

    Conclusion

    There’s no single winner in the hardwood vs laminate flooring decision — it genuinely comes down to your budget, how the space will be used, and how long you plan to stay in the home. Laminate offers practicality and cost savings for busy households; hardwood offers long-term value and authenticity for those willing to invest more upfront. Either way, understanding these trade-offs clearly beforehand avoids a flooring decision you’ll regret a few years in.

    Suggested image alt text:

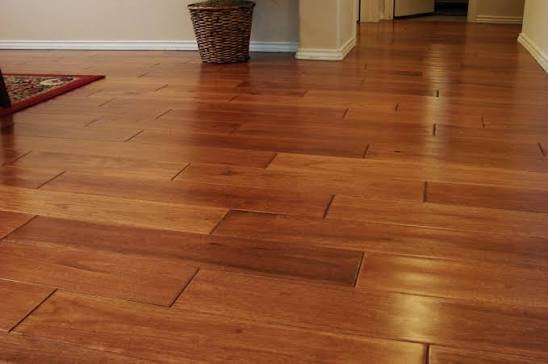
    • “Side-by-side comparison of hardwood and laminate flooring samples”
    • “Hardwood flooring being refinished by professional”
    • “Laminate flooring installation with click-lock planks”
  • Introduction

    Introduction

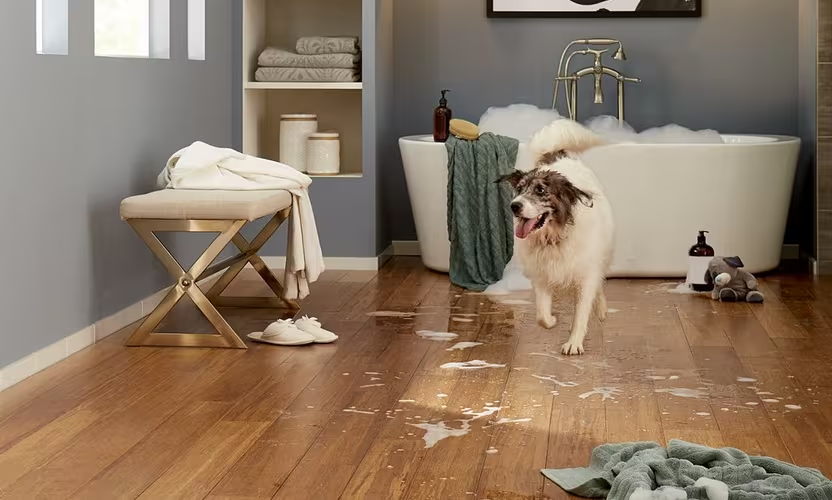
    Anyone who’s lived with a dog or cat knows flooring takes a beating — scratches, accidents, muddy paws after a walk. Choosing the best flooring for pets upfront saves a lot of frustration (and money on repeated refinishing) down the line. Not every flooring type handles pet life equally well, so it’s worth thinking this through before installation, not after the first set of scratches shows up.

    What Makes Flooring Pet-Friendly

    Featured snippet: The best flooring for pets combines scratch resistance, water resistance, and a textured surface that isn’t too slippery for paws — vinyl, luxury vinyl plank, and certain engineered woods with harder finishes consistently rank among the top choices for homes with dogs or cats.

    Luxury Vinyl Plank (LVP)

    LVP has become one of the most popular choices for pet owners, and for good reason — it’s water-resistant, reasonably scratch-resistant, and mimics the look of hardwood without the same vulnerability to damage.

    • Handles moisture from accidents or wet paws far better than real hardwood
    • Available in textures that provide decent grip for pets
    • More affordable than genuine hardwood, with easier repair if a plank gets damaged

    Tile

    Tile is extremely durable and scratch-resistant, making it a strong choice for high-traffic pet areas. The main downside is that it can feel cold and hard, and grout lines need occasional cleaning to avoid staining or odour buildup.

    Engineered Hardwood With a Hard Finish

    If you want the look of real wood, engineered hardwood with a scratch-resistant finish handles pets better than traditional solid hardwood, though it’s still not as resilient as vinyl or tile.

    Featured snippet: Engineered hardwood with a hardened finish is a reasonable middle-ground choice for pet owners who want a wood look, since it offers more scratch resistance than solid hardwood while still providing better warmth and comfort underfoot than tile.

    Laminate Flooring

    Modern laminate options have improved significantly in scratch resistance and water resistance, making them a budget-friendly alternative that still holds up reasonably well to pet activity, though not quite as durable as LVP or tile.

    What to Avoid

    Solid hardwood, while beautiful, scratches easily and doesn’t handle moisture well — a combination that doesn’t hold up long in a home with active pets. Similarly, very soft, low-pile carpet tends to trap odours and stains more than harder flooring surfaces.

    Considering Traction for Older or Larger Pets

    For older dogs or larger breeds, overly smooth or glossy flooring can be genuinely difficult to walk on, sometimes contributing to joint strain. Textured finishes on vinyl or tile provide better grip without sacrificing durability.

    Balancing Pet-Friendliness With Household Aesthetic

    The good news is that pet-friendly flooring doesn’t mean sacrificing style — modern LVP and engineered wood options come in a wide range of finishes that look genuinely close to real hardwood, so you’re not choosing between practicality and appearance anymore.

    FAQ

    Q: What’s the most scratch-resistant flooring for pets? Tile is generally the most scratch-resistant, followed closely by luxury vinyl plank with a durable wear layer.

    Q: Is hardwood flooring bad for homes with pets? Solid hardwood is more vulnerable to scratches and moisture damage compared to engineered wood, vinyl, or tile, making it a less ideal choice for very active pets.

    Q: Does flooring choice affect pet safety? Yes, overly smooth or glossy surfaces can be slippery for pets, particularly older or larger dogs, so textured finishes are generally safer.

    Q: Is carpet ever a good choice for homes with pets? Low-pile, stain-resistant carpet can work in lower-traffic areas, but harder flooring generally handles accidents and cleanup better in main living spaces.

    Q: Is luxury vinyl plank durable enough for large dogs? Yes, quality LVP with a thick wear layer holds up well even for larger, more active dogs.

    Q: How often does pet-friendly flooring need replacing compared to standard flooring? With proper flooring choices like LVP or tile, pet homes shouldn’t need more frequent replacement than any other home — the whole point is durability suited to daily pet activity.

    Conclusion

    Choosing the best flooring for pets comes down to balancing durability, water resistance, and comfort underfoot. Luxury vinyl plank and tile consistently perform best for active households, while engineered hardwood offers a solid middle ground for those wanting a wood look. Whatever you choose, prioritising scratch resistance and moisture handling upfront saves a lot of hassle compared to dealing with damaged flooring later.

    Suggested image alt text:

    • “Dog lying on scratch-resistant luxury vinyl plank flooring”
    • “Textured tile flooring in a pet-friendly home”
    • “Engineered hardwood flooring with pet paw prints nearby”
  • Introduction

    Introduction

    Roof inspections aren’t something most homeowners think about until there’s already a problem, which is a bit backwards — a proactive inspection often catches issues while they’re still cheap to fix. This roof inspection checklist walks through what a professional actually looks at, and roughly how long the whole process takes.

    How Long Does a Roof Inspection Typically Take?

    Featured snippet: A standard residential roof inspection typically takes 45 minutes to 2 hours, depending on roof size, complexity, and whether the inspector needs to access the attic and interior ceiling areas in addition to the roof surface itself.

    For larger or more complex roofs, or ones with multiple levels and features like skylights or chimneys, inspections can run longer.

    Exterior Roof Surface Check

    The inspector examines shingles, tiles, or roofing material for cracking, curling, missing pieces, or granule loss, along with checking flashing around chimneys, vents, and skylights for gaps or deterioration.

    • Overall condition and wear of the primary roofing material
    • Flashing integrity around all roof penetrations
    • Gutter condition and proper drainage function

    Structural Assessment

    Beyond surface material, a thorough inspection checks for sagging, uneven areas, or signs of structural stress that might indicate underlying support issues rather than just surface wear.

    Attic and Interior Inspection

    Featured snippet: A thorough roof inspection checklist always includes checking the attic from the inside for water stains, mould, inadequate insulation, and proper ventilation — issues that are often invisible from outside but indicate real roof problems developing underneath the surface.

    This step is genuinely important and sometimes skipped by less thorough inspectors — always ask specifically whether attic access is included.

    Ventilation and Insulation Check

    Poor attic ventilation accelerates roof deterioration from the inside, even if the exterior looks fine. A good inspection assesses whether ventilation is adequate for the roof’s design and climate.

    Gutter and Drainage Assessment

    Clogged or poorly functioning gutters cause water to pool or run down exterior walls, eventually leading to damage. Inspectors check gutter condition, attachment, and whether water is draining properly away from the foundation.

    Checking for Pest or Animal Damage

    Small gaps around roof edges or vents can allow pests to enter, and their presence often causes additional damage over time. A thorough inspection checks for entry points and signs of nesting or damage.

    What You Should Receive After an Inspection

    A proper roof inspection should conclude with a written report — not just a verbal summary — detailing findings, photos where relevant, and clear recommendations, whether that’s routine maintenance, targeted repairs, or replacement.

    How Often Should Roof Inspections Happen?

    Most professionals recommend an inspection at least once a year, plus additional checks after major storms or extreme weather events that could have caused damage not immediately visible from the ground.

    FAQ

    Q: How long does a typical roof inspection take? Usually 45 minutes to 2 hours, depending on roof size and complexity.

    Q: Does a roof inspection include the attic? A thorough inspection should include the attic, since many issues show up there before becoming visible on the exterior surface.

    Q: How often should I get my roof inspected? At least once a year, with additional inspections after significant storms or extreme weather.

    Q: What’s included in a typical roof inspection checklist? Exterior surface condition, flashing, structural assessment, attic and ventilation check, and gutter/drainage evaluation.

    Q: Should I get a written report after a roof inspection? Yes, a proper inspection should include a written report with findings and recommendations, not just a verbal summary.

    Q: Is a roof inspection worth the cost if there’s no visible problem? Yes — catching minor issues early through routine inspection is generally far cheaper than addressing major damage after it develops.

    Conclusion

    A proper roof inspection checklist covers far more than a quick glance at the shingles from the ground — it includes structural assessment, attic checks, ventilation, and drainage, all of which affect roof lifespan. Getting an inspection annually, and always after major storms, catches small issues while they’re still inexpensive to fix rather than letting them develop into major repairs.

    Suggested image alt text:

    • “Roof inspector examining shingles and flashing”
    • “Attic inspection for water stains and ventilation”
    • “Gutter inspection during roof assessment”