Blog

  • How to Choose a Home Security Camera in 2026

    How to Choose a Home Security Camera in 2026

    Walk into any electronics store and you’ll find a wall of security cameras, all claiming to be the best option. Most people end up picking based on price alone, which honestly isn’t the smartest way to make this decision.

    Knowing how to choose a security camera properly means understanding a handful of specs that actually matter for your specific home, not just going with whatever’s on sale.

    What Should You Actually Prioritise When Choosing a Camera?

    Quick answer: When learning how to choose a security camera, prioritise resolution (at least 1080p), field of view, night vision quality, and storage options over brand name alone — these factors determine real-world usefulness far more than marketing claims.

    1. Indoor vs Outdoor Cameras

    Outdoor cameras need weatherproofing (look for an IP65 rating or higher) and typically cost more than indoor-only models. Don’t use an indoor camera outside expecting it to survive monsoon exposure — it genuinely won’t last.

    2. Resolution Matters More Than You’d Think

    A 1080p camera is the practical minimum for identifiable footage. Lower resolution options are cheaper but often produce footage too blurry to be useful in an actual incident — defeating the entire purpose of having a camera.

    3. Field of View and Placement

    • Wide-angle cameras (130°+) cover more area with fewer units needed
    • Corner placement typically captures more useful footage than wall-center placement
    • Entry points (main door, back door, ground floor windows) should be prioritised over interior rooms

    Quick answer: For most homes, prioritising camera placement at entry points — main door, back door, ground-floor windows — provides more security value than covering every interior room, since these are the most common access points for intrusion.

    4. Night Vision Quality

    Most cameras claim night vision, but quality varies significantly. Look specifically for infrared range specifications — cameras with 10-15 metre effective night range genuinely perform better than budget options claiming vague “night vision” without specifics.

    5. Storage Options: Cloud vs Local

    1. Cloud storage: convenient, accessible remotely, but comes with monthly subscription costs
    2. Local SD card storage: one-time cost, no subscription, but vulnerable if the camera itself is stolen or damaged
    3. Hybrid options: some cameras offer both, giving redundancy

    6. WiFi Reliability and Camera Connectivity

    Check your home’s WiFi coverage at the planned camera location before purchasing. A camera in a dead zone with weak signal will drop connection frequently, making footage unreliable exactly when you need it most.

    7. Motion Detection and Alert Accuracy

    Cheaper cameras often have poor motion detection, triggering false alerts from moving shadows or small animals. Better models use more sophisticated detection, distinguishing between actual movement of concern and irrelevant triggers.

    8. Budget Ranges to Expect

    Entry-level indoor cameras start around ₹1,500-₹3,000. Mid-range outdoor cameras with good night vision and weatherproofing run ₹3,500-₹7,000. Premium options with advanced AI detection features can exceed ₹10,000 per unit.

    FAQs

    Q: How many security cameras does a typical home need? For most homes, 2-4 cameras covering main entry points provide solid coverage without unnecessary overspending on interior room monitoring.

    Q: Is cloud storage necessary for a home security camera? Not necessarily — local SD card storage works well for most homeowners and avoids ongoing subscription costs.

    Q: What resolution is good enough for identifying faces on camera footage? 1080p is generally sufficient for face identification at reasonable distances; 4K offers more detail but requires significantly more storage.

    Q: Do outdoor security cameras work well during monsoon season? Yes, if properly rated for weather resistance (IP65 or higher) — check this specification before purchasing for outdoor use.

    Q: Can security cameras be hacked, and how do I prevent this? Yes, poorly secured cameras can be vulnerable — always change default passwords and keep firmware updated to reduce this risk.

    Conclusion

    Learning how to choose a security camera properly means looking past marketing claims and focusing on resolution, placement, night vision quality, and storage options that genuinely fit your home. Prioritise entry points first, and don’t assume the most expensive option is automatically the best fit for your specific needs. [link to related guide on smart door locks vs traditional locks here]

    Alt text suggestions:

    1. “Outdoor weatherproof security camera installed near main entrance”
    2. “Home security camera with night vision capturing entry point”
    3. “Homeowner checking security camera app on smartphone”

  • Termite Prevention and Home Maintenance Tips

    Termite Prevention and Home Maintenance Tips

    Termites are sneaky in the worst way. They can work through wooden structures for months, sometimes years, before any visible damage shows up. By the time you notice, the repair bill is often far bigger than it would’ve been with early prevention.

    These termite prevention tips cover what actually reduces risk, based on how termites typically enter and spread through Indian homes.

    What Actually Attracts Termites to a Home?

    Quick answer: Termites are primarily attracted to moisture, untreated wood in contact with soil, and cellulose-based materials like cardboard stored near the foundation — controlling these factors is the foundation of effective termite prevention.

    1. Control Moisture Around the Foundation

    Termites need moisture to survive, and damp soil near your home’s foundation creates ideal conditions. Fix any drainage issues directing water toward the foundation, and ensure gutters aren’t overflowing near foundation walls.

    2. Keep Wood Away from Direct Soil Contact

    Any wooden structure — fencing, furniture, firewood storage — touching soil directly creates an easy entry point. Elevate wood storage on concrete or metal stands instead.

    3. Regular Inspection of Wooden Structures

    • Check door and window frames for hollow-sounding wood
    • Inspect furniture legs and wooden flooring edges periodically
    • Look for mud tubes along walls, a telltale sign of subterranean termites

    Quick answer: Mud tubes running along walls or foundations are one of the clearest visible signs of subterranean termite activity, and spotting these early allows for treatment before structural damage becomes extensive.

    4. Pre-Construction Termite Treatment

    If you’re building new or doing major renovation involving foundation work, pre-construction anti-termite treatment is significantly more effective and cheaper than post-construction treatment after an infestation has already started.

    5. Regular Professional Inspection

    Even without visible signs, a professional termite inspection every 2-3 years catches early infestations before they cause serious structural damage. This typically costs ₹1,500-₹3,000 depending on home size.

    6. Reduce Cellulose Material Storage

    Cardboard boxes, old newspapers, and paper stored in basements or storage areas provide termites with an easy food source close to your home’s structure. Store these in sealed plastic containers instead.

    7. Natural and Chemical Prevention Options

    1. Neem-based natural repellents, milder but require more frequent reapplication
    2. Chemical soil treatment barriers, longer-lasting but need professional application
    3. Termite baiting systems, effective for ongoing monitoring and control

    8. What to Do If You Spot an Infestation

    Quick answer: If you spot termite activity — mud tubes, hollow wood, discarded wings near windows — contact a professional pest control service immediately, since DIY treatments often only address surface symptoms without eliminating the underlying colony.

    Don’t try to handle an active infestation entirely yourself. I’ve seen people spray generic pesticide on visible termites, feel satisfied, and then discover the colony was still thriving elsewhere in the structure months later.

    FAQs

    Q: How do I know if I have a termite problem before visible damage appears? Mud tubes along walls, hollow-sounding wood when tapped, and discarded wings near windows are early warning signs worth investigating.

    Q: Is termite treatment a one-time thing or does it need repeating? Most chemical soil treatments last 5-10 years, but periodic inspection is still recommended to catch any new activity early.

    Q: Can termites cause serious structural damage to a concrete home? Yes, particularly to wooden components like doors, window frames, and roof structures, even in predominantly concrete construction.

    Q: What’s the cost of professional termite treatment in India? Typically ₹8,000-₹25,000 depending on home size and treatment type, varying by city and severity of infestation if any exists.

    Q: Do natural termite repellents actually work? They offer some deterrent effect but are generally less effective and longer-lasting than professional chemical treatments for active infestations.

    Conclusion

    Good termite prevention comes down to controlling moisture, avoiding direct wood-to-soil contact, and catching early signs through regular inspection. It’s genuinely one of those maintenance tasks that costs very little compared to the structural damage an unchecked infestation can eventually cause. [link to related guide on gutter cleaning here]

    Alt text suggestions:

    1. “Mud tubes on foundation wall indicating termite activity”
    2. “Pest control professional inspecting wooden door frame for termites”
    3. “Elevated firewood storage preventing termite entry points”
  • Gutter Cleaning and Maintenance Guide

    Gutter Cleaning and Maintenance Guide

    Gutters are one of those home features nobody thinks about until water starts pooling somewhere it shouldn’t. I genuinely didn’t think much about mine either, until a neighbour’s overflow during monsoon caused visible damage to their exterior wall paint within a single season.

    This gutter cleaning guide covers what actually needs doing, how often, and the warning signs that mean you’ve waited too long.

    Why Does Gutter Cleaning Matter So Much?

    Quick answer: Clogged gutters cause water to overflow and pool near the foundation, leading to dampness, wall staining, and over time, potential structural damage — regular gutter cleaning prevents this at a fraction of the cost of fixing water damage later.

    1. How Often Should Gutters Actually Be Cleaned?

    Twice a year is the general recommendation — once before monsoon season and once after, when leaves and debris have had time to accumulate. Homes near trees may need a third check mid-monsoon if heavy leaf fall is an issue.

    2. What You’ll Need for DIY Gutter Cleaning

    • A sturdy ladder, properly secured
    • Work gloves, since debris can include sharp material
    • A garden hose for flushing after debris removal
    • A small trowel or scoop for compacted debris

    3. Step-by-Step DIY Cleaning Process

    1. Remove larger debris by hand or scoop, working from the downspout outward
    2. Flush the gutter with a hose to check for proper water flow
    3. Check downspouts specifically for blockages, since these clog more than the gutter itself
    4. Inspect for any sagging sections or loose brackets while you’re up there

    4. Signs Your Gutters Need Attention Right Now

    Quick answer: Visible sagging, water overflowing during rain rather than draining through the downspout, and plant growth inside the gutter are all clear signs that immediate gutter cleaning or repair is needed.

    5. When to Call a Professional Instead

    If your home has more than two storeys, or the gutters are in genuinely poor condition with rust or structural damage, it’s worth hiring a professional service rather than risking a fall. Professional gutter cleaning typically costs ₹1,500-₹4,000 depending on home size.

    6. Gutter Guards — Worth the Investment?

    Gutter guards reduce debris accumulation significantly, cutting cleaning frequency roughly in half. They cost more upfront — typically ₹150-₹300 per running foot — but can genuinely be worth it for homes surrounded by trees with heavy leaf fall.

    7. Common Mistakes During Gutter Maintenance

    • Cleaning only the visible gutter section and ignoring downspouts
    • Using a pressure washer that’s too strong, which can damage gutter seams
    • Skipping the post-monsoon check, assuming pre-monsoon cleaning was enough

    8. Connecting Gutter Health to Overall Home Maintenance

    Gutter issues rarely stay isolated. Overflow can lead to foundation dampness, exterior wall damage, and even basement seepage in severe cases — making this a small task with genuinely outsized consequences if ignored. [link to related guide on termite prevention here]

    FAQs

    Q: How often should gutters be cleaned in a monsoon-heavy region? At least twice a year, with a possible mid-season check if surrounded by trees shedding heavy debris.

    Q: Can clogged gutters actually cause foundation damage? Yes, over time — overflowing water pooling near the foundation repeatedly can lead to dampness and structural issues.

    Q: Is DIY gutter cleaning safe for a single-storey home? Generally yes, with a properly secured ladder and basic safety precautions; multi-storey homes are better handled by professionals.

    Q: Do gutter guards eliminate the need for cleaning entirely? No, they reduce frequency significantly but don’t eliminate the need for periodic checks and occasional cleaning.

    Q: What’s the cost of professional gutter cleaning service? Typically ₹1,500-₹4,000 depending on home size and gutter condition, varying by city and service provider.

    Conclusion

    Regular gutter cleaning is a small, often-overlooked maintenance task that genuinely prevents much bigger and more expensive water damage problems down the line. Set a twice-yearly reminder, check for warning signs like sagging or overflow, and don’t hesitate to call a professional for multi-storey homes or gutters in poor condition. [link to related guide on water heater maintenance here]

    Alt text suggestions:

    1. “Homeowner cleaning debris from gutter before monsoon season”
    2. “Clogged gutter with leaves causing water overflow”
    3. “Gutter guard installation to reduce debris accumulation”
  • Bathroom Renovation Ideas on a Small Budget

    Bathroom Renovation Ideas on a Small Budget

    Bathrooms are small rooms, but somehow they end up with some of the biggest renovation quotes in the house. Tiles, plumbing, waterproofing — it adds up fast if you’re not careful about where the money actually goes.

    The good news is, plenty of bathroom renovation ideas deliver a genuinely noticeable transformation without needing the full tear-it-all-out treatment. Let’s go through what actually moves the needle on a smaller budget.

    Can You Really Renovate a Bathroom Without Breaking the Bank?

    Quick answer: Yes — focusing your budget on fixtures, lighting, and surface-level updates rather than full tile replacement or plumbing changes can transform a bathroom for ₹40,000-₹80,000, compared to ₹1.5-3 lakhs for a complete renovation.

    1. Re-Grout Instead of Retile

    Stained, discoloured grout is often the actual culprit behind a tired-looking bathroom, not the tiles themselves. Re-grouting costs a fraction of retiling and can genuinely transform how clean and fresh the space looks.

    2. Replace Fixtures, Not Fittings

    New taps, a showerhead, and a towel rail — swapped for updated finishes like matte black or brushed gold — instantly modernise a bathroom’s look for around ₹8,000-₹15,000.

    3. Upgrade the Mirror and Lighting

    A plain rectangular mirror and a single overhead bulb make even a well-tiled bathroom feel dated. Adding a framed mirror and warm sconce lighting on either side changes the entire mood for roughly ₹4,000-₹7,000.

    Quick answer: Lighting and mirror upgrades are among the highest-impact, lowest-cost changes in any bathroom renovation, often transforming perceived quality more than a full tile replacement would for the same budget.

    4. Paint What Can Be Painted

    Bathroom cabinets, if not water-damaged, can be sanded and repainted rather than replaced entirely — a genuine cost-saver that still delivers a visibly fresh look.

    5. Add Storage Without Structural Work

    • Wall-mounted shelving above the toilet
    • A slim rolling cart for extra storage
    • Over-the-door hooks and organisers

    These solve clutter problems that make small bathrooms feel messier than they actually are, without any construction involved.

    6. Focus on One Accent Element

    Rather than spreading a limited budget thin across everything, pick one standout element — a patterned accent tile strip, a striking mirror frame, or a bold vanity colour — and let it carry the visual interest.

    7. Address Water Damage First, Always

    Quick answer: Before any cosmetic bathroom renovation ideas are implemented, address underlying water damage or seepage issues first — cosmetic fixes over unresolved moisture problems will fail within months and cost more to redo later.

    I’ve seen this mistake more than once — people spend on pretty fixtures while ignoring a slow leak underneath, and within a year the “renovation” needs redoing entirely.

    8. DIY-Friendly Small Changes

    Cabinet hardware swaps, caulking touch-ups, and even painting are genuinely doable yourself, saving on labour costs for the smaller cosmetic elements.

    A Sample ₹60000 Budget Breakdown

    1. Re-grouting — ₹8,000
    2. New fixtures (taps, showerhead) — ₹15,000
    3. Mirror and lighting — ₹7,000
    4. Cabinet paint and hardware — ₹6,000
    5. Storage additions — ₹5,000
    6. Contingency for minor plumbing fixes — ₹19,000

    FAQs

    Q: What’s the cheapest way to make a bathroom look renovated? Re-grouting combined with new fixtures and lighting delivers the biggest visual change for the lowest cost.

    Q: Should I fix plumbing issues before or after cosmetic bathroom renovation? Always before — cosmetic upgrades over unresolved plumbing or water damage issues will need redoing sooner than expected.

    Q: Can I renovate a bathroom myself to save money? Cosmetic elements like painting and hardware, yes; plumbing and electrical work should still go to licensed professionals.

    Q: How much does a small budget bathroom renovation typically cost? Generally ₹40,000-₹80,000 for a fixture and cosmetic-focused renovation, compared to ₹1.5-3 lakhs for full retiling and structural changes.

    Q: Is re-grouting really as effective as retiling? For bathrooms with structurally sound tiles, yes — it addresses the discoloration and grime that usually makes a bathroom look dated.

    Conclusion

    Good bathroom renovation ideas on a tight budget come down to prioritising what genuinely changes perception — fixtures, lighting, grout — over full structural overhauls. Address any water damage first, then focus your limited budget on the changes that deliver the most visible impact. [link to related guide on home renovation timeline here]

    Alt text suggestions:

    1. “Freshly re-grouted bathroom tiles with updated matte black fixtures”
    2. “Small bathroom with new mirror and warm sconce lighting”
    3. “Wall-mounted storage shelving in a budget-renovated bathroom”
  • How Long Does a Home Renovation Actually Take?

    How Long Does a Home Renovation Actually Take?

    “It’ll take about a month” is one of the most commonly broken promises in home renovation. I’ve heard this from contractors more times than I can count, and the actual project almost always runs longer than that initial estimate.

    Understanding a realistic home renovation timeline upfront saves you from the frustration of constantly moved deadlines and helps you plan your life around the actual disruption, not the optimistic version.

    Why Do Renovation Timelines Almost Always Run Longer?

    Quick answer: Renovation timelines typically extend 20-30% beyond initial estimates due to material delivery delays, unexpected structural issues discovered mid-project, and scheduling conflicts between different tradespeople working sequentially rather than simultaneously.

    1. Single Room Cosmetic Renovation

    For a straightforward cosmetic refresh — paint, fixtures, minor updates — expect 1-2 weeks. This assumes no structural changes and materials are readily available without custom orders.

    2. Kitchen Renovation Timeline

    A mid-range kitchen renovation typically takes 4-6 weeks from demolition to completion. This includes electrical and plumbing work, cabinet installation, and countertop fitting, which often has its own lead time for custom fabrication.

    3. Bathroom Renovation Timeline

    Quick answer: A standard bathroom renovation typically takes 2-4 weeks, though this can extend to 6 weeks if waterproofing issues are discovered during demolition or if custom tile orders face delivery delays.

    4. Full Home Renovation Timeline

    For renovating an entire home — multiple rooms, possibly some structural work — realistically budget 3-6 months depending on the scope. Larger, more complex renovations involving structural changes can stretch to 8-12 months.

    5. Factors That Extend Timelines

    • Custom material orders (imported tiles, specific fixtures) adding weeks of lead time
    • Structural surprises once walls or flooring are opened up
    • Monsoon season delays for any exterior or waterproofing work
    • Contractor scheduling conflicts with other ongoing projects

    6. What Actually Happens Week by Week (Kitchen Example)

    1. Week 1: Demolition and initial electrical/plumbing rough-in
    2. Week 2-3: Cabinet installation and countertop templating
    3. Week 4: Countertop installation, once fabricated
    4. Week 5: Appliance installation and finishing touches
    5. Week 6: Final inspection and touch-ups

    7. How to Realistically Plan Around Renovation Disruption

    If you’re renovating a kitchen, plan for a temporary cooking setup for at least 4-5 weeks, not the 2 weeks the initial quote might suggest. Being conservative with your own planning genuinely reduces stress when the timeline inevitably shifts a bit.

    8. Questions to Ask Your Contractor Upfront

    Quick answer: Ask your contractor specifically about material lead times, their current workload with other projects, and what contingency buffer is built into the quoted timeline — vague timeline promises without these details are a common source of frustrating delays.

    • What’s the lead time on any custom-ordered materials?
    • How many other projects are you currently managing simultaneously?
    • What’s your typical timeline overrun percentage on similar projects?

    Seasonal Considerations for Timeline Planning

    Renovation projects scheduled just before monsoon season often face additional delays, particularly anything involving exterior work or waterproofing. Planning major renovations for post-monsoon months, when material delivery and working conditions are more predictable, tends to keep timelines more realistic.

    FAQs

    Q: How long does a full kitchen renovation take on average? Typically 4-6 weeks for a mid-range renovation, though custom fabrication elements can extend this to 8 weeks.

    Q: Why did my renovation take longer than the contractor quoted? Common causes include material delivery delays, unexpected structural issues, and contractors juggling multiple simultaneous projects.

    Q: Is it normal for renovation timelines to run over the initial estimate? Yes, unfortunately quite common — budgeting an extra 20-30% time buffer beyond the initial quote is a realistic approach.

    Q: Does monsoon season affect indoor renovation timelines too? Yes, indirectly — material delivery and worker availability can both be affected during heavy monsoon periods, even for indoor projects.

    Q: How can I speed up my home renovation timeline? Confirming material availability before starting demolition and choosing readily available rather than custom-ordered materials genuinely helps keep timelines shorter.

    Conclusion

    A realistic home renovation timeline almost always runs a bit longer than the initial quote, and planning for that upfront saves considerable stress. Ask detailed questions about material lead times and contractor availability before committing to a start date, and build in a reasonable buffer for your own planning around the disruption. [link to related guide on bathroom renovation ideas here]

    Alt text suggestions:

    1. “Kitchen renovation in progress showing cabinet installation timeline”
    2. “Contractor reviewing renovation schedule with homeowner”
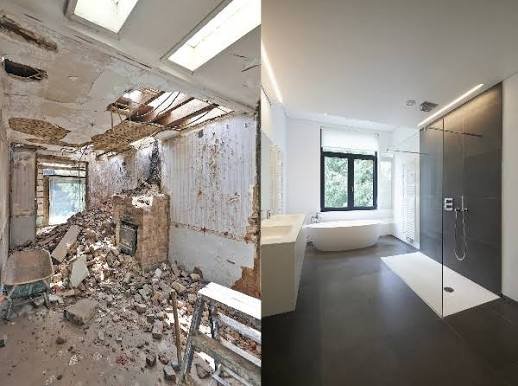
    3. “Bathroom renovation demolition phase before waterproofing work”
  • DIY vs Professional Home Improvement: What to Hire Out

    DIY vs Professional Home Improvement: What to Hire Out

    YouTube makes everything look easy. Watch enough renovation videos and you start believing you can retile a bathroom in a weekend. Then reality hits somewhere around hour three, and you’re standing in a half-finished mess wondering where it went wrong.

    The DIY vs professional home improvement decision isn’t really about skill level alone — it’s about knowing which tasks genuinely reward the effort and which ones just aren’t worth the risk.

    How Do You Decide What to DIY and What to Hire Out?

    Quick answer: In the DIY vs professional home improvement decision, tasks involving electrical wiring, gas lines, structural changes, or major plumbing should always go to licensed professionals, while cosmetic work like painting, minor repairs, and basic assembly are generally safe and cost-effective to DIY.

    1. Tasks That Are Genuinely Safe to DIY

    • Painting walls and touch-ups
    • Installing shelving or basic furniture assembly
    • Changing light fixtures (with power off, obviously)
    • Minor caulking and grout touch-ups
    • Basic garden landscaping

    These tasks have low risk if something goes wrong, and honestly, doing them yourself teaches you a lot about your own home in the process.

    2. Tasks That Should Always Go to Professionals

    1. Electrical wiring and panel work — genuine fire and safety risk
    2. Gas line connections or appliance installation
    3. Structural changes, including load-bearing wall removal
    4. Major plumbing involving main water lines
    5. Roof work beyond minor patching

    Quick answer: Electrical and gas-related work should never be attempted as DIY projects, regardless of how simple online tutorials make them look, since even small mistakes can create serious safety hazards affecting the entire home.

    3. The Cost Savings Reality Check

    DIY can genuinely save 30-50% on labour costs for simpler projects. But factor in your own time, the cost of tools you might need to buy, and the risk of mistakes requiring professional correction — sometimes the “savings” shrink considerably once you account for all of this honestly.

    4. Tasks in the Grey Zone

    Some projects sit in between — tiling, basic carpentry, minor plumbing fixes. These depend heavily on your actual skill level and comfort with the specific task, not a blanket rule.

    • Tiling: doable with patience, but uneven results are common for beginners
    • Basic carpentry: reasonable for simple shelving, riskier for load-bearing furniture
    • Minor plumbing: fine for tap washers, risky for anything involving pipe joints

    5. What Skipping Professional Help Actually Costs You

    Picture a homeowner who DIY’d bathroom tiling to save money, only to have water seepage issues within a year from improper waterproofing underneath. The “savings” ended up costing more than hiring a professional would have, plus the hassle of redoing the work.

    6. Tools and Time Investment Worth Considering

    Before committing to DIY, honestly assess whether you already own the necessary tools or would need to buy them. A one-time project might not justify a ₹5,000 tool purchase you’ll rarely use again.

    7. When DIY Genuinely Makes Sense

    • You have relevant prior experience with similar tasks
    • The task has low consequences if done imperfectly
    • You have realistic time availability to do it properly, not rushed

    FAQs

    Q: What home improvement tasks save the most money when done DIY? Painting and minor cosmetic repairs typically offer the best savings-to-risk ratio for DIY projects.

    Q: Is it ever worth hiring a professional for painting? For large exterior jobs or intricate detail work, yes — professionals work faster and often achieve a more even finish.

    Q: Can I install a ceiling fan myself? Only if you’re comfortable safely turning off power at the breaker; otherwise, hire an electrician for this task.

    Q: What’s the biggest mistake people make attempting DIY home improvement? Underestimating the complexity of tasks that look simple in tutorials, particularly plumbing and electrical work.

    Q: How do I know if a wall is load-bearing before attempting DIY changes? You genuinely can’t tell reliably without professional assessment — always consult a structural engineer before touching any wall.

    Conclusion

    The DIY vs professional home improvement decision comes down to honest self-assessment about risk, skill, and true cost savings. Handle the cosmetic, low-risk tasks yourself with confidence, but don’t hesitate to hire out anything involving electrical, gas, structural, or major plumbing work — the money saved isn’t worth the potential safety risk or costly do-overs. [link to related guide on home improvement loan here]

    Alt text suggestions:

    1. “Homeowner painting a wall as a DIY home improvement project”
    2. “Licensed electrician working on home wiring panel”
    3. “Comparison of DIY tools versus professional contractor equipment”
  • Home Improvement Loans: How to Finance Your Renovation

    Home Improvement Loans: How to Finance Your Renovation

    Renovation dreams have a funny way of outpacing bank balances. You want that kitchen redone, maybe a new bathroom, and suddenly the number staring back at you is a lot bigger than what’s sitting in your savings account.

    That’s exactly where a home improvement loan comes in. It’s not the only option, but for a lot of homeowners in 2026, it’s genuinely the most practical way to bridge that gap without draining every rupee of savings.

    What Exactly Is a Home Improvement Loan?

    Quick answer: A home improvement loan is an unsecured or secured personal loan specifically meant for renovation, repair, or upgrade work on your home, typically offering faster approval than a home loan top-up but at a somewhat higher interest rate.

    1. Types of Home Improvement Loans Available

    • Unsecured personal loans marketed specifically for renovation
    • Home loan top-up, if you already have an existing home loan
    • Loan against property, for larger renovation budgets
    • Credit card EMI options, for smaller, quick fixes

    2. Interest Rates You Can Expect in 2026

    Unsecured home improvement loans typically carry interest rates between 10.5% and 16%, depending on your credit score and the lender. Home loan top-ups are usually cheaper, often in the 8.5-10% range, since they’re secured against your existing property.

    Quick answer: Home loan top-ups generally offer lower interest rates than standalone home improvement loans, since the lender already holds your property as collateral, reducing their risk compared to an unsecured loan.

    3. Eligibility Criteria Most Lenders Check

    • Credit score, ideally above 700 for the best rates
    • Stable income, salaried or self-employed with proof of consistent earnings
    • Existing debt-to-income ratio, since lenders don’t want your EMIs stacking too high

    4. Documents You’ll Typically Need

    1. Identity and address proof
    2. Income proof — salary slips or ITR for self-employed applicants
    3. Property documents, if applying for a secured loan
    4. Renovation estimate or quotation from your contractor, sometimes required

    5. How Much Can You Actually Borrow?

    This varies significantly by lender and loan type, but unsecured home improvement loans generally range from ₹50,000 to ₹40 lakhs, while home loan top-ups can go higher depending on your existing loan and property value.

    6. Comparing Top-Up Loans vs Fresh Personal Loans

    Picture two homeowners — one already has an ongoing home loan with a good repayment record, the other doesn’t. The first genuinely has an easier, cheaper path through a top-up loan. The second will likely end up with a standalone personal loan at a somewhat higher rate.

    7. Tax Benefits Worth Knowing About

    Quick answer: Interest paid on a home improvement loan used for repair or renovation of a self-occupied property can qualify for tax deduction under Section 24(b), up to ₹30,000 annually — a detail many homeowners overlook when comparing financing options.

    8. Common Mistakes to Avoid

    • Borrowing more than the actual renovation needs, just because it’s approved
    • Not comparing processing fees across lenders, which can add up
    • Ignoring prepayment penalty clauses if you plan to close the loan early

    Should You Even Take a Loan for Renovation?

    Not every renovation needs financing. For smaller projects under ₹1-2 lakhs, it’s often worth saving up over a few months instead of paying loan interest. For larger structural work, a loan genuinely makes more financial sense than delaying necessary repairs.

    A Simple Decision Checklist

    1. Do you have an existing home loan? Check the top-up option first
    2. Is the renovation urgent (structural, safety-related)? Financing makes sense
    3. Is it purely cosmetic and under ₹2 lakhs? Consider saving instead

    FAQs

    Q: What’s the maximum tenure for a home improvement loan? Typically 5-15 years depending on loan type, with unsecured personal loans usually capped shorter than home loan top-ups.

    Q: Can I get a home improvement loan with a low credit score? It’s possible but expect higher interest rates or the need for a co-applicant with stronger credit history.

    Q: Is a home loan top-up better than a personal loan for renovation? Generally yes, if you already have a home loan, since top-ups offer lower interest rates due to existing collateral.

    Q: Do I need to submit renovation estimates to get the loan approved? Some lenders require this, especially for larger loan amounts, while smaller unsecured loans may not ask for detailed quotations.

    Q: How long does home improvement loan approval typically take? Unsecured personal loans can be approved within 24-72 hours; home loan top-ups may take slightly longer due to property verification.

    Conclusion

    A home improvement loan can genuinely make sense when the renovation is necessary and the numbers work out favourably against your existing savings and debt situation. Compare top-up options against fresh personal loans first, check the tax benefit angle, and avoid borrowing more than your actual project needs. [link to related guide on bathroom renovation ideas here]

    Alt text suggestions:

    1. “Homeowner reviewing home improvement loan documents with a lender”
    2. “Renovation budget planning with loan calculator on laptop”
    3. “Contractor providing renovation quotation for loan application”